I love cooking with Sous Vide!

First of all, I’d like to thank Snickers for taking over the blog last week.  I have been very busy and really appreciate his attempt to cover for me.  He’s so sweet and helpful and I’m glad you all have had a chance to hear from him.  I will let him do a lot of the writing when we take off on our adventure.  For today, back to food…

I have been using a sous vide machine for about two months now.  I had been thinking about getting one for over a year but it seemed kind of frivolous and I wasn’t sure I would use it enough to justify the expense.  But when I decided to downsize my kitchen, and after doing a lot of research, I realized that this tool could take up a small space and do a lot of work!

IMG_1219
Way too hot for fish!  Needs 130 degrees for only 30 minutes!  This was set up for something else!

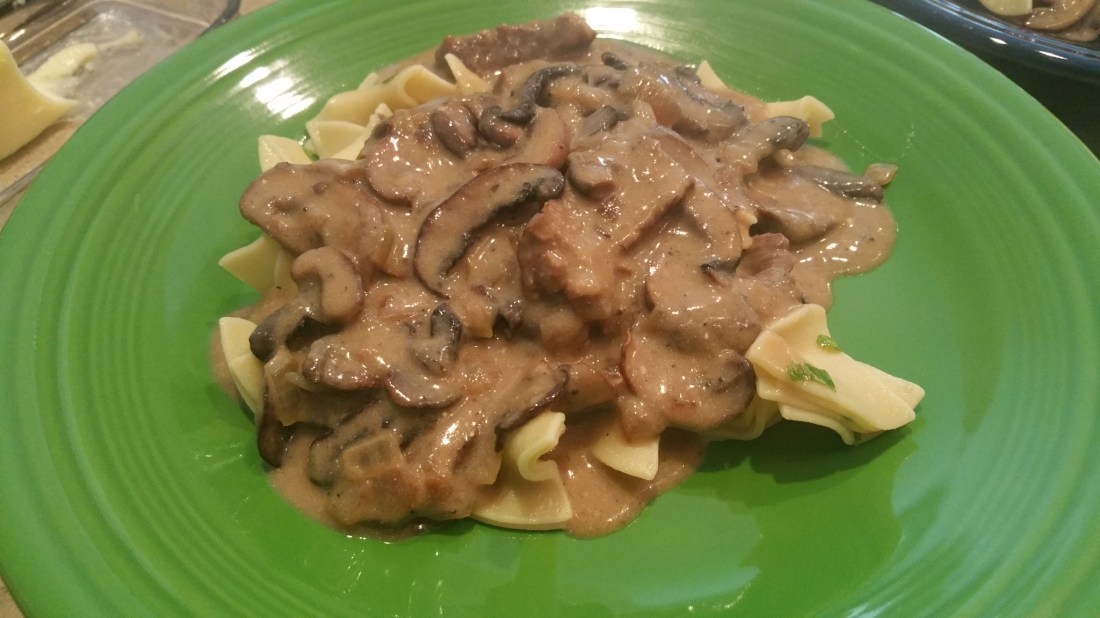
“Sous Vide” is French for “under vacuum”.  It describes a form of cooking where you vacuum seal a piece of food, submerge it in water, and cook it slowly at a low, steady temperature.  This ensures that the food never exceeds the perfect level of doneness.  Vegetables stay crisp and don’t lose any nutrition into their cooking water, because they don’t ever contact the cooking water.  Chicken breasts cannot dry out because they don’t get hot enough to squeeze the moisture out of them, as so often happens when they are baked or sautéed.  Beef remains at a perfect medium rare (my preferred temperature for the quintessential steak).  I have even learned to enjoy cooking fish, my kitchen nemesis! 

IMG_1264
All set up and ready to go!

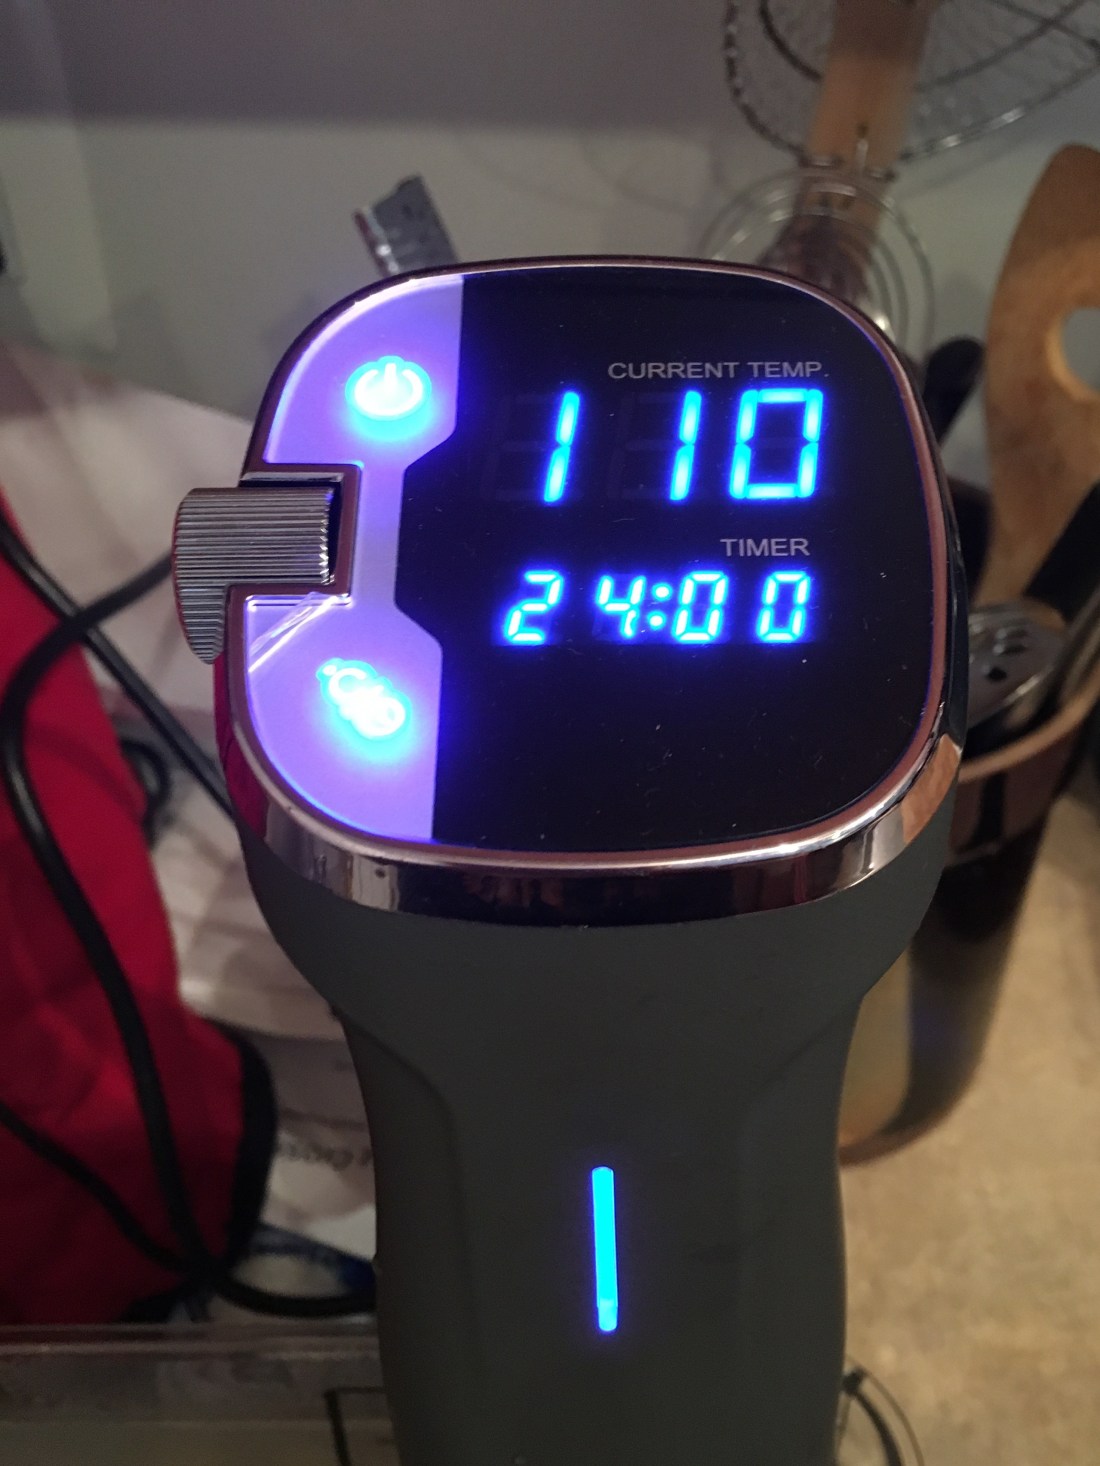
If you’ve checked out my yogurt post of a week or so ago, you’ve seen my sous vide machine in action.  It’s perfect for keeping the milk and culture mixture at the perfect temperature for curd development.  It makes the entire yogurt making process easy, and relatively care free. 

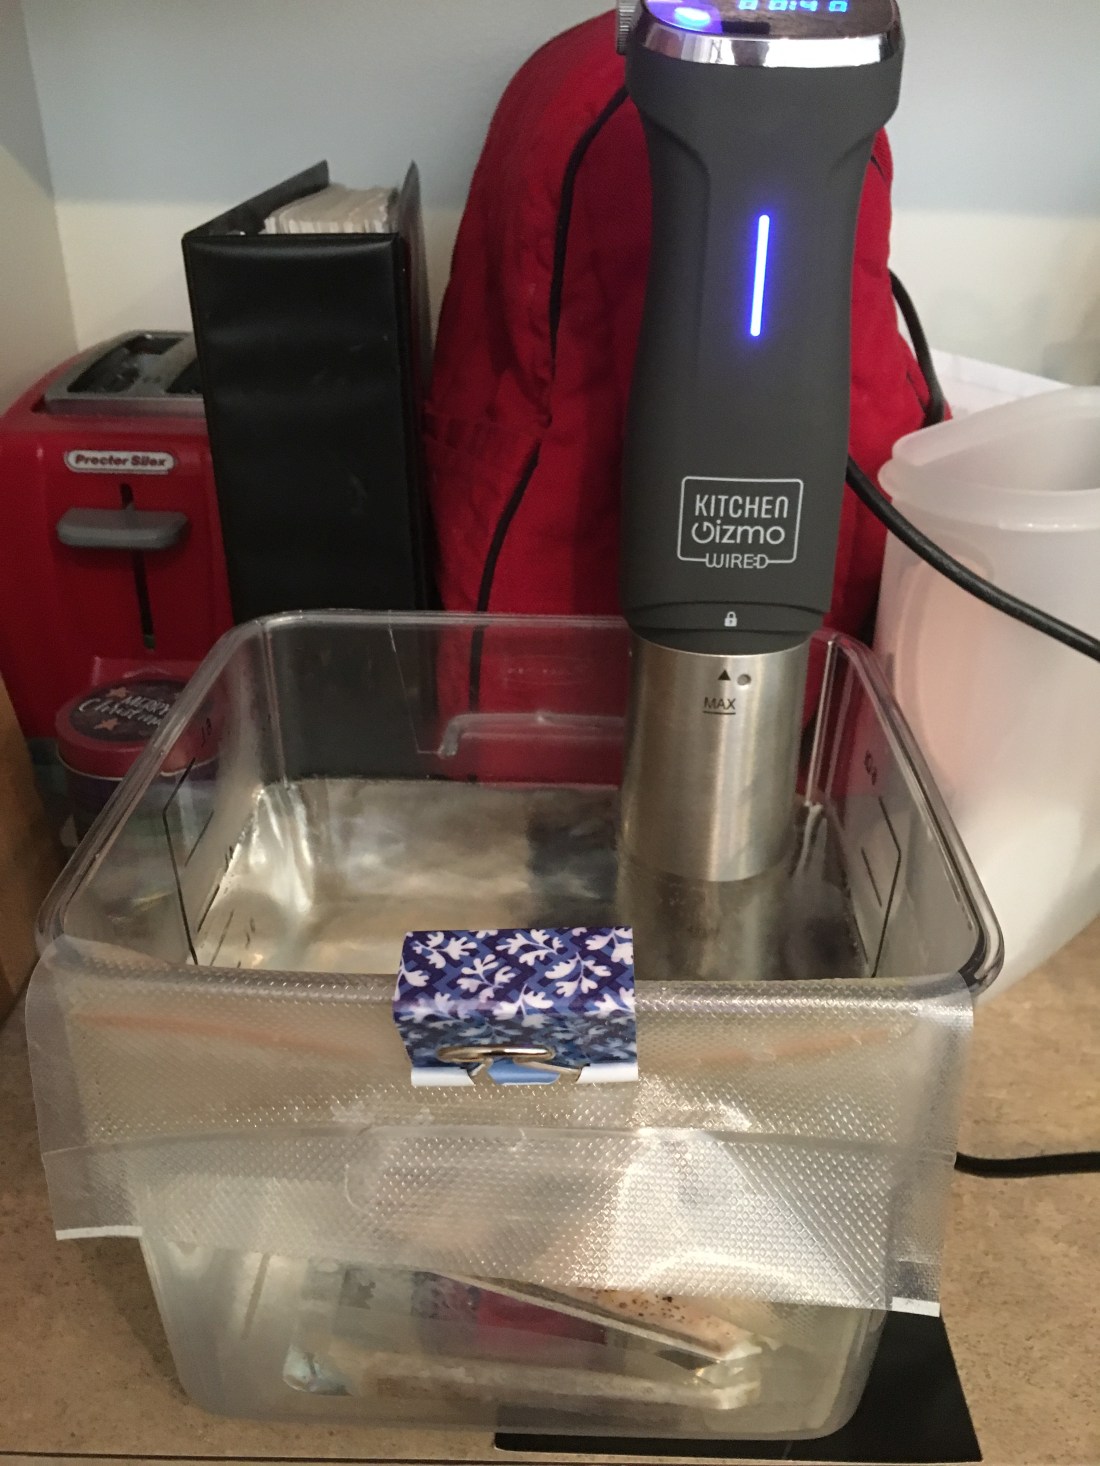
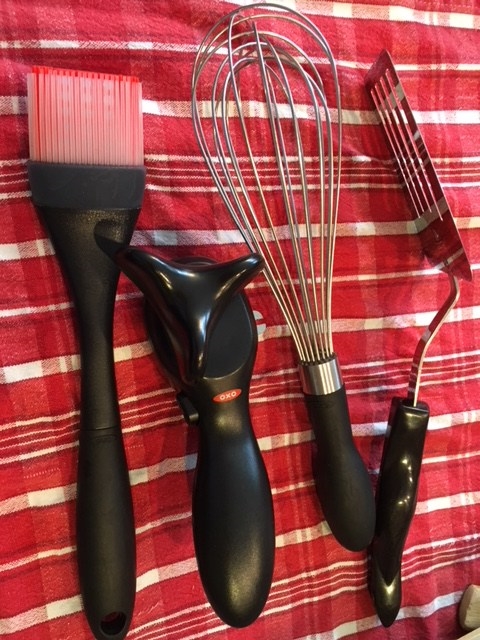
There are a variety of machines on the market.  Some will attach to your phone via Bluetooth or wifi.  The benefit of these machines is that they come with recipes on your phone or the company’s website, which can make the process pretty foolproof.  I don’t like the idea of any website tracking my cooking and kitchen habits (except this one) so I decided to go a little more basic.  I just fill a container with water, clip the machine onto the edge, making sure that the water is between the minimum and maximum water lines and plug it in.  I can set the water temperature and cooking time, then just press the “on” button and prepare my food while the water heats to the correct temperature.  I have to do a little more research but my kitchen doesn’t tell anyone what I’m doing!

Today, I decided to tackle (hah!) fish in the sous vide water bath.  I found some swordfish steaks at my local grocery store that looked pretty good so decided to give it a try. 

IMG_1257
Swordfish steak with za’atar and sumac


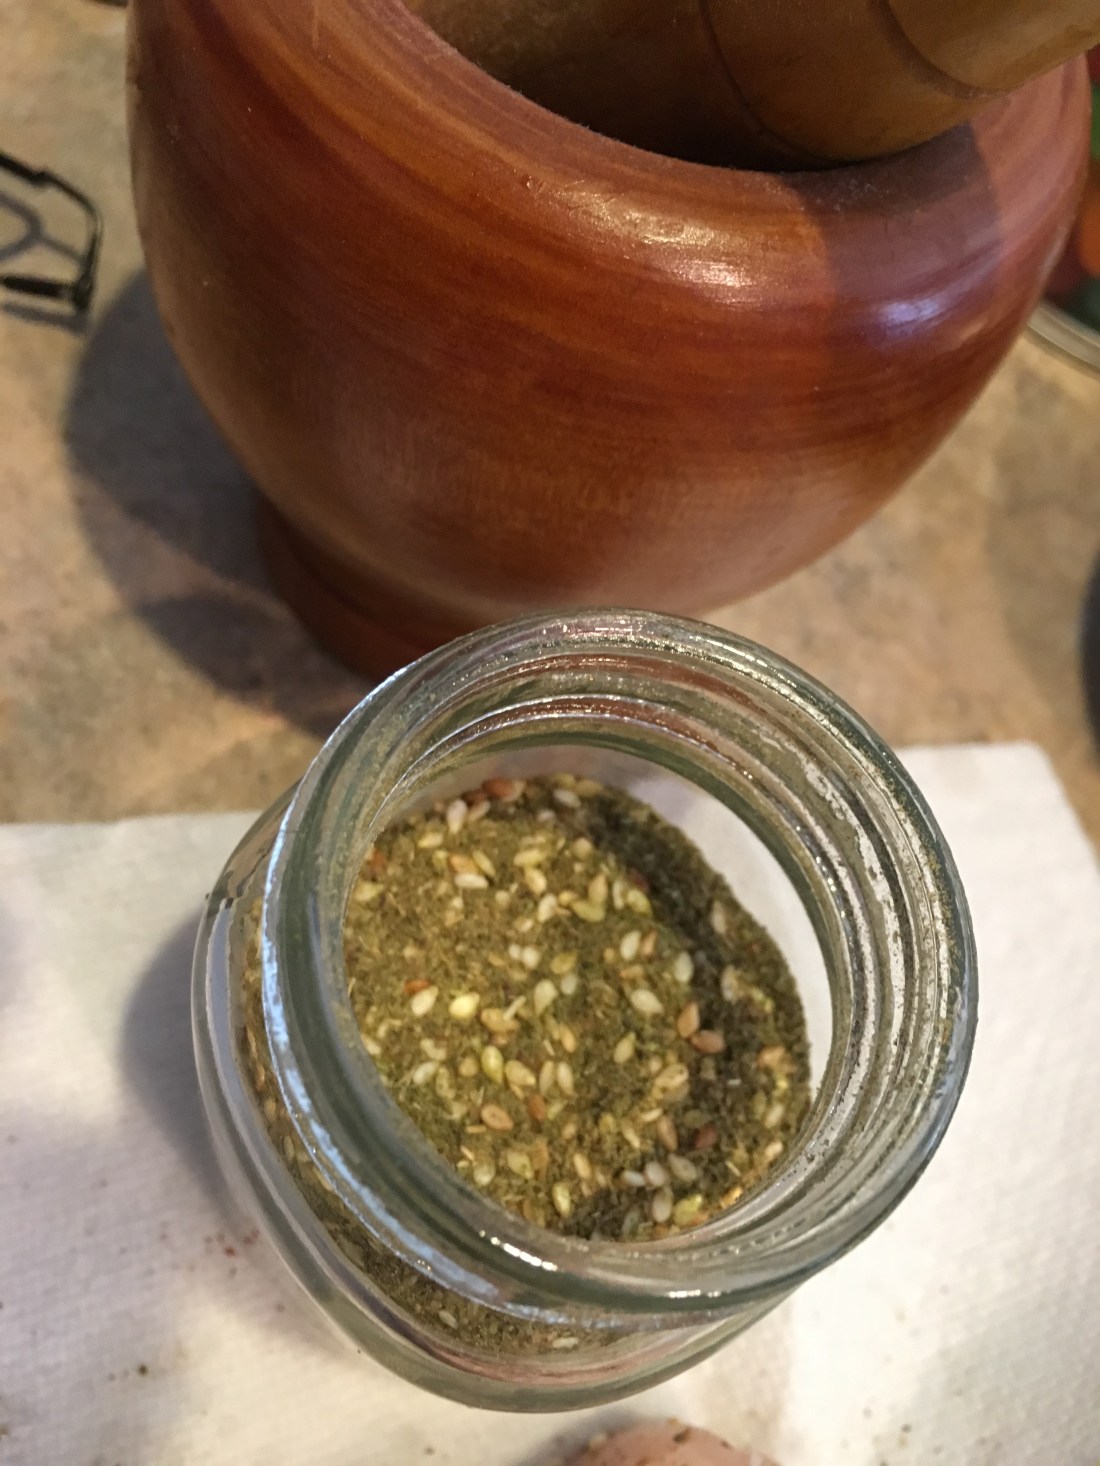
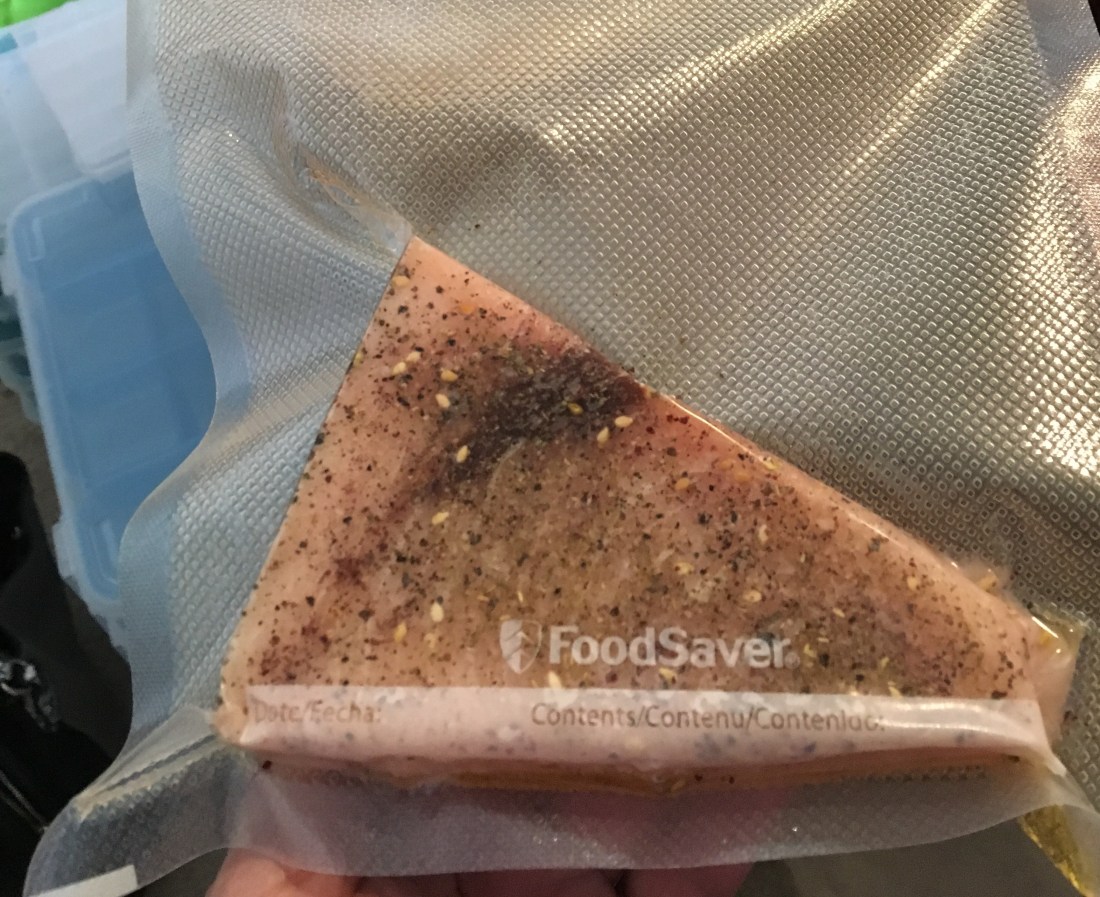
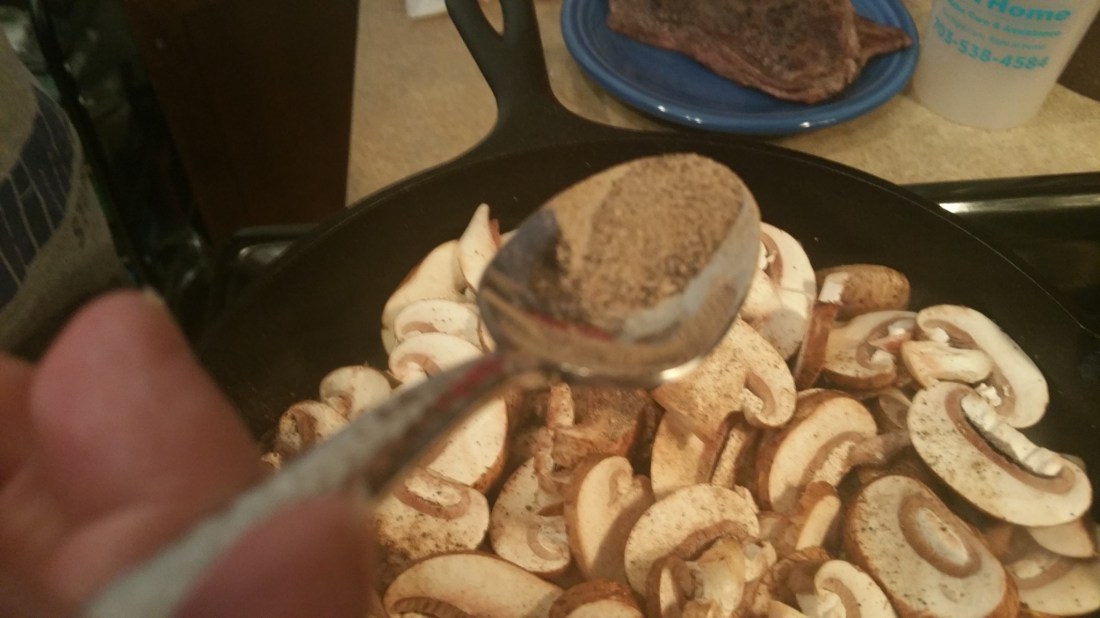
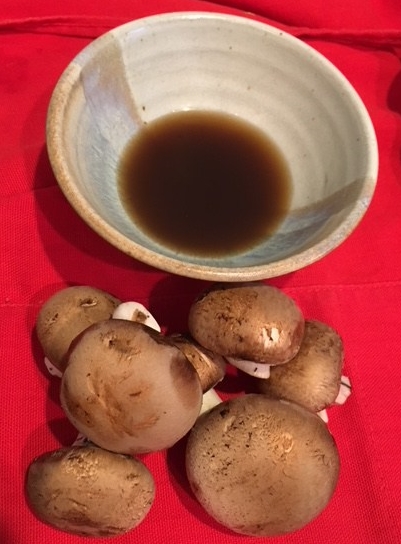
I patted my swordfish steak dry with a paper towel and sprinkled both sides with salt and pepper.  I looked in the spice cupboard and found some Za’tar, a Middle Eastern herb and spice blend containing thyme, sumac, sesame seeds and other herbs.  This is one of my favorite mixtures for chicken and fish as it is flavorful but not overwhelming.  I added a little extra sumac because it adds a citrusy tang and I didn’t have any lemon zest on hand.  I placed it in the vacuum bag with a little bit of olive oil and sealed it up. 

img_1262.jpg

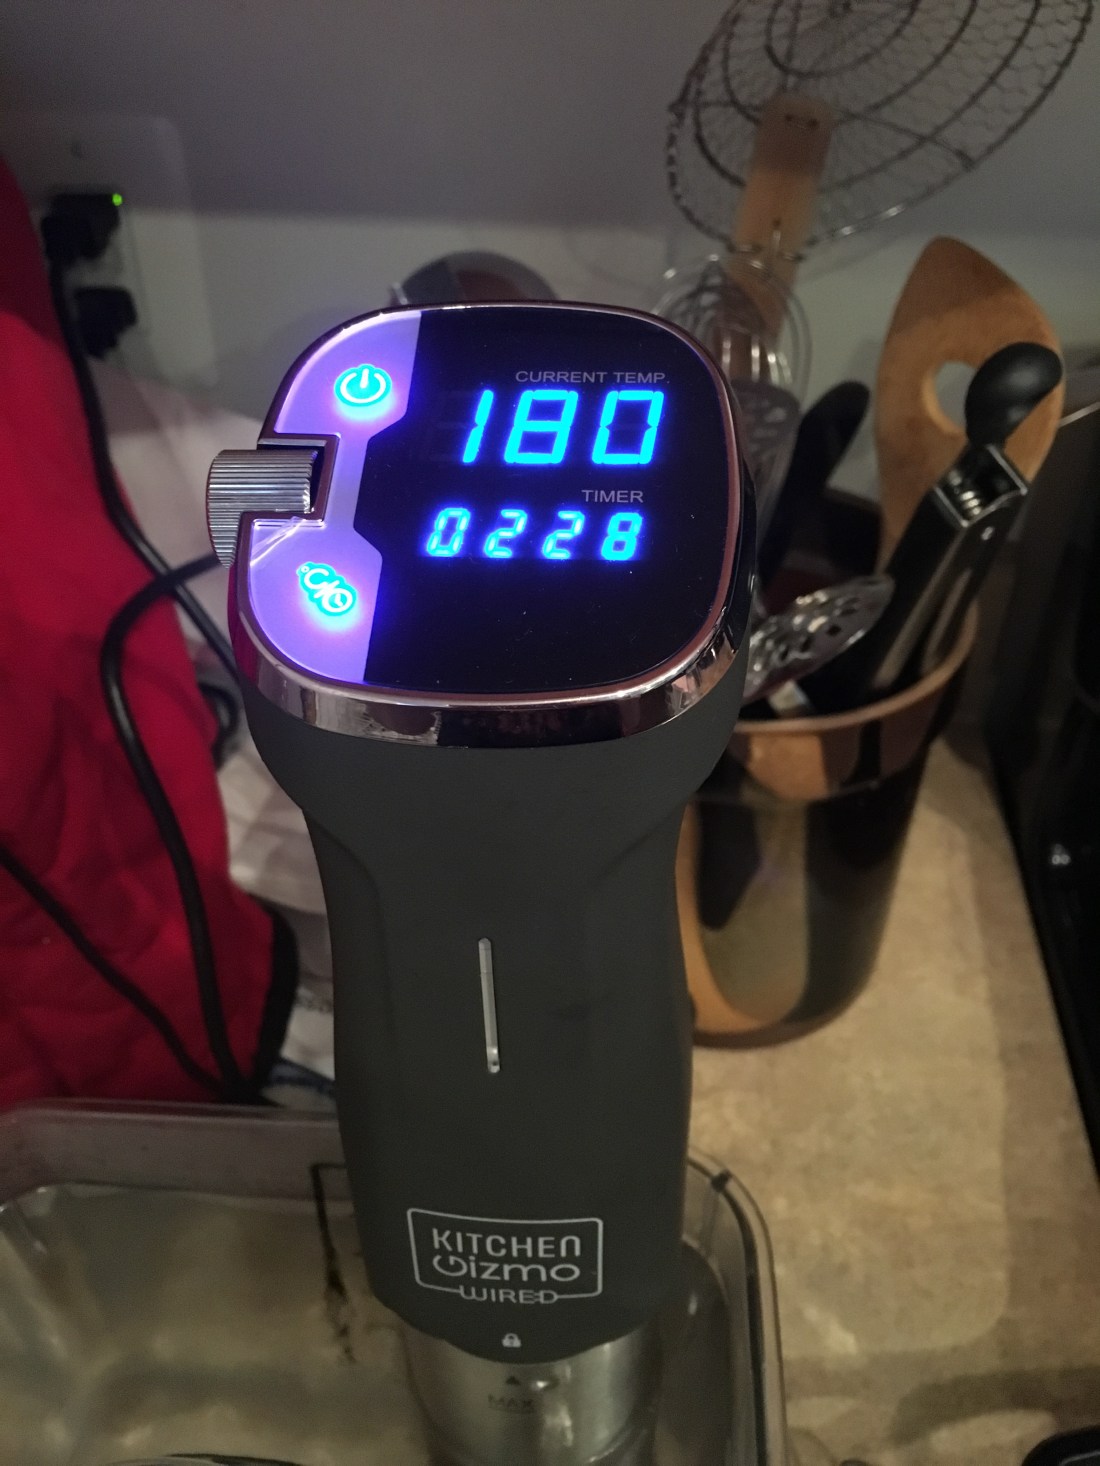
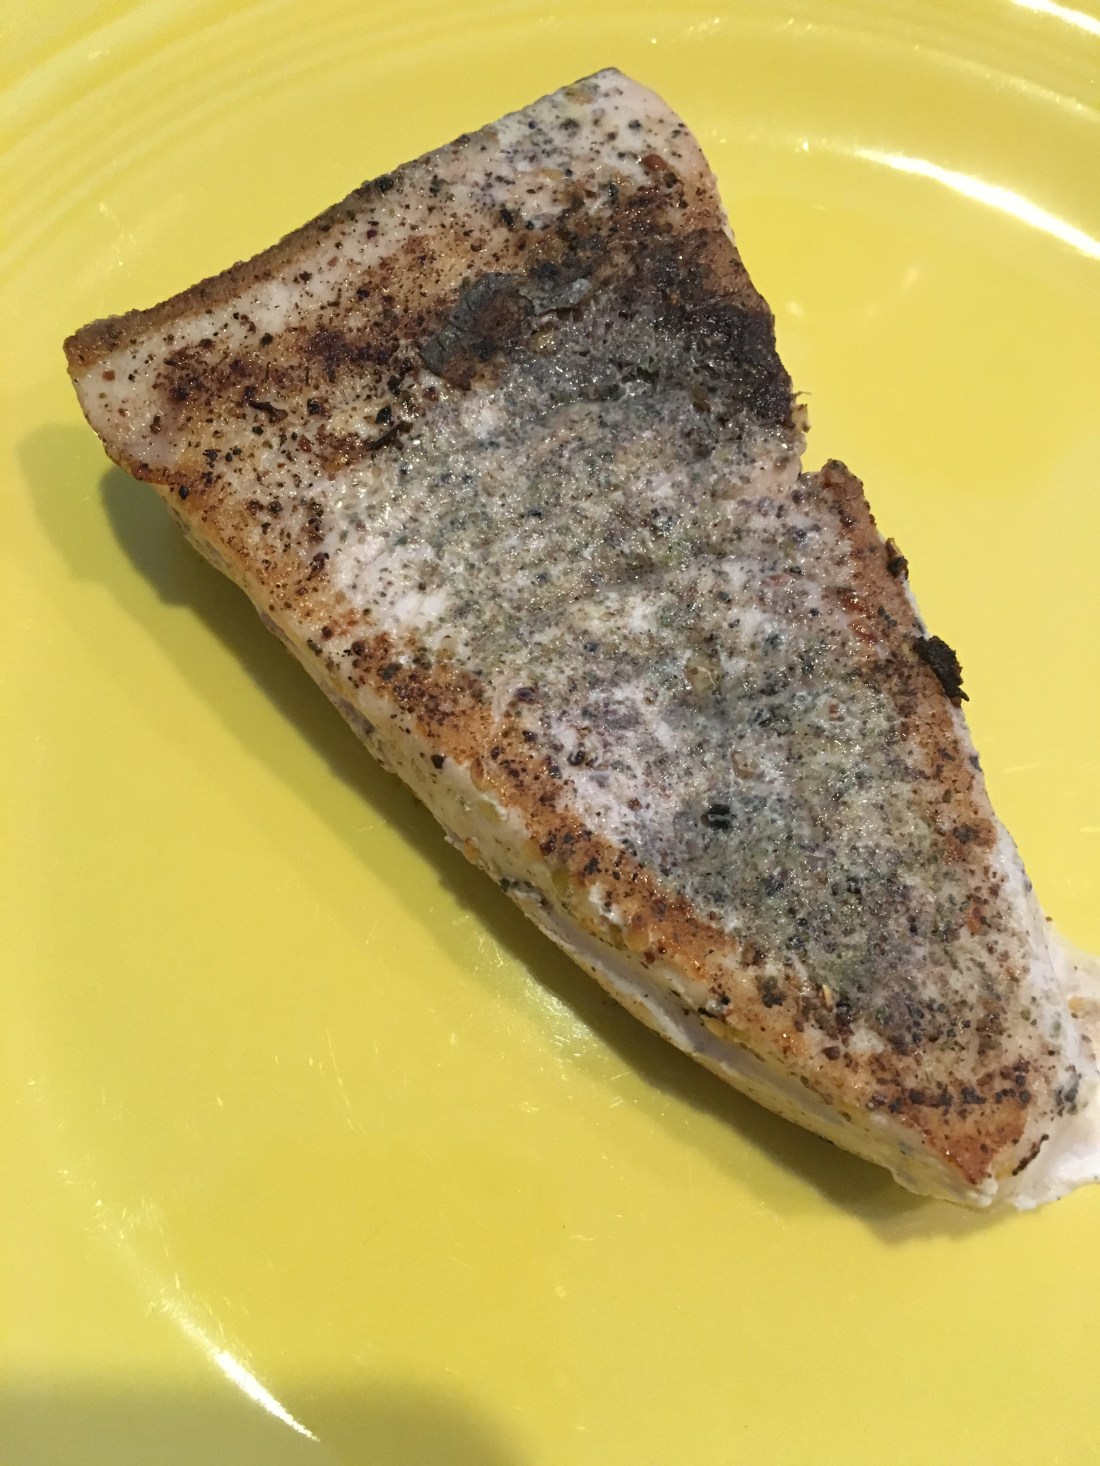
I heat the water bath up to 130 degrees Fahrenheit.  This is the perfect temperature for swordfish, according to the temperature guide that came with my machine.  After clipping the bag of vacuum sealed fish and spices into the water, I set the timer for 30 minutes.  After the timer went off, I took out the packet, dried it off and sliced off the top.  While flavorful and perfectly cooked, the appearance of my steak leaves much to be desired.  It’s pallid, pale, and pasty looking!  Easily fixed!  I heat up my trusty cast iron skillet to rocket temperatures and slap that steak onto the blazing surface.  Wait 30 seconds, flip it over, wait another 30 seconds and a perfectly golden seared surface appears.  Crispy, tasty, and perfectly tender inside, the lovely swordfish steak becomes an elegant entrée. 

IMG_1266
Believe me, it tasted better than it looked!

Sous vide cooking is easy, takes up very little space, and does not heat up a kitchen on a steamy summer day.  An added benefit is that my dish washing water is already hot.  I just need to pour it into the sink and add soap! 

I am Snickers!

Hi, everyone! 

My name is Snickers.  I took over Mommy’s blog because she hasn’t had any time to write.  Besides, she just writes about food and doesn’t share any of the yummy smelling things she cooks with me!  Since I am much more important and interesting than food, I decided that I will write the blog this time. 


IMG_0014
This is my face before my haircut!

My dog mother was a Schnauzer and my dog father was an Australian Cattle Dog.  Mommy says that this means that I have a Lot of Energy!  Someone told Mommy that my father was something called a “Yorkie” but Mommy knew that wasn’t right because I got so big and was so bouncy!  She did something called a “DNA test” that told her the truth about me! 

I like to run Really Fast and I like to Chase.  I love to play Fetch.  I go get my ball and bring it to Mommy and tell her “Throw” (she understands barking) and she throws my ball so many times!  I get so happy when I can play Fetch.  Mommy even got me some Cows because I am a Cattle Dog and needed some!  I have five stuffed Cows with squeakies in them.  I love to have Mommy throw the Cows and I go get them and let her throw them lots and lots!  Sometimes I chew on them to make them squeak really loud.

IMG_0983
This is me and one of my 5 cows!

I have lived with Mommy for two years.  I came to live with her because the lady I lived with before didn’t have time to take care of me.  I had to stay in a crate all the time and didn’t get to play or run around or chase balls, or any of the fun things that Mommy lets me do.  I was very unhappy.  When I first came to live with Mommy I didn’t know any Rules but I learned quickly.  Mommy says that now I am a Very Good Dog.  I don’t know what that means but Mommy gives me lots of tummy scratches when she says it!

IMG_1021
Mommy says this is my Mischief face!

Mommy was sad when I came to live with her because her friend, Copper, had just died.  Her other friend, Baron, was sad too.  He cried all day until I came to be his new little brother.  Baron taught me how to be a Very Good Dog!  He couldn’t play very much because his legs were tired and his back hurt most of the time, but he liked to watch me play and run.  He told me that he used to run and play and chase and sniff, just like I do!  He went to go be with Copper in December and I miss him a lot.  Before he died, he told me that I have to take care of Mommy. 

IMG_0950
This is Baron. He was tired a lot.


I do a Good Job when I take care of Mommy.  I bark at all the dogs who walk past our house.  I let them know that they can’t come in our house and hurt my Mommy.  Sometimes, Mommy tells me to “Be Quiet” when I bark but she doesn’t know that those dogs are Dangerous!  She has no idea how many times I have saved her life by telling those dogs to Go Away!

IMG_0967


I have lots of stories to tell so I will write Mommy’s blog sometimes.  Mommy said we are going to have an Adventure soon.  I don’t know what an Adventure is, but Mommy says we will have fun.  All I know is that the house has lots of boxes in it.  But none of my Toys are in the boxes and my dish is where it belongs so everything is Okay.  And I am still a Very Good Dog.  (Mommy says I used too many exclamation points but that’s How I Roll!)

I made homemade, lactose-free yogurt!

Grocery shopping when you are allergic and food intolerant can be rather difficult. The frozen food section is full of enticing pre-made meal offerings, most of which contain ooey, gooey, delicious cheese. The produce section contains dangerous items like cabbage, broccoli, cauliflower, and kale, none of which I can eat. The canned food aisle is full of beans. Nuts are everywhere and in everything!

supermarket refrigerators
Photo by Fancycrave.com on Pexels.com

I wander over to the dairy section to grab my lactose-free milk to make some homemade farmer’s cheese (yum!) and glance longingly at the yogurt section. I see a sign. “Lactose-Free Yogurt” it says! My heart leaps, then sinks slowly to my feet as I realize that it is made from soy milk, or almond milk, or cashew milk. Still nothing for me. I decided to search the internet for assistance. Surely there are recipes for lactose-free yogurt out there. What I found out is that there are lots of recipes for homemade yogurt, most of which require the use of…yogurt. Sigh. With a lot more searching, I finally found a recipe for lactose-free yogurt that used nut milk and a culture that could be purchased online. I decided to try an experiment with my lactose-free milk (thank you, Lactaid!) and this recipe and see what I ended up with. I ordered some Bulgarian yogurt cultures from Amazon and gave it a shot.  Neither of these companies pay me to advertise for them…I just have good results from using them.


I heated up the milk with my sou-vide machine (my new favorite kitchen tool) to 180 degrees F and held it there for 30 minutes.

img_1218.jpg

I then cooled it to 110 degrees F in an ice bath in the sink.

I added the cultures and poured it into a jar. Since I wasn’t sure what part lactose (the milk sugar I cannot digest) plays in the development of yogurt-y goodness, I added a tablespoon of honey (from my sister’s bees) just in case sugar was a necessary component.

IMG_1224

I put the jar back into the sou vide bath with the timer set for 24 hours at 110 degrees F.  I knew I wouldn’t need that long but wanted to over estimate just in case.  It only took 6 hours.

IMG_1227

The instructions that came with the yogurt cultures said to check after 5 hours. I stuck a spoon into the jar at hour 6 and a glistening spoonful of whey appeared atop a creamy concoction that looked an awful lot like yogurt!

IMG_1230
Whey on top of gelled yogurt.

The jar came out of the water bath and into the refrigerator it went. A couple of hours later, I opened the jar and took a taste. Sweet, tangy, creamy and delicious yogurt!

Since I like Greek yogurt better than regular yogurt I had to strain the initial supply into a thicker form. Coffee filters work really well for this, but I had to strain it in small batches of two cups at a time.

img_1231.jpg

I ended up with a little over two pints of creamy Greek yogurt from two quarts of milk.

IMG_1232
Two pints plus a half cup of strained yogurt

I kept out six tablespoons of the original yogurt to make another batch.

IMG_1233
Unstrained yogurt saved for the next batch.

I have never liked plain yogurt before but this stuff is delightful. I have mixed it with a cut up peach, sprinkled it with granola, eaten it plain, and mixed it with cherry jam so far. I think I can see tzatziki in my future!

IMG_1237
Fresh yogurt with cherry jam!


According to what I’ve read, I can make more yogurt from this yogurt.  I do feel a sense of obligation to those six little tablespoons of starter yogurt that I set aside. I don’t know how long the cultures will live in my refrigerator and how soon I have to make more yogurt. But so far, I am happy with the stuff I have and have found myself turning to yogurt with fruit as a tasty snack. I’ve already eaten most of the original batch and will make more this weekend.  Experiment successful!

IMG_1234
Fresh yogurt with fresh peaches!

grocery cart with item

Beef Stroganoff

I used to think that I didn’t like Beef Stroganoff.  It wasn’t a meal that was served in my home growing up and, if it was, it was usually a ground beef-based boxed mix that was mostly salt and mushy noodles, combined with rubbery mushrooms.  No wonder I thought Stroganoff was awful stuff!

As I have learned to cook over the years, I wanted to try some of the “recipes” my mother fed us as kids and see if they could be fixed and made, not only edible, but delicious.  I discovered that Beef Stroganoff is really good, if cooked correctly.

There are three main elements to good Beef Stroganoff: mushrooms, sauce, and beef.  The first is the mushrooms.  You can make good Stroganoff and leave out the beef completely…if you cook the mushrooms correctly. Rubbery, gray, slimy mushrooms were the bane of my childhood and are the reason that many people believe that they don’t like them.  The important thing to remember about mushrooms is that you have to cook them, and then cook them some more.   I usually use about a pound of Cremini mushrooms, cut into 1/8 inch thick slices.

20180601_170229

Place two tablespoons oil and two tablespoons butter into a large skillet (I use my cast iron).  Heat your pan over medium until your oil starts to shimmer and add the mushrooms.  Sprinkle with salt and pepper and start cooking over medium heat.  There’s nothing wrong with adding some of the dried mushroom dust left over from making mushroom ketchup if you have some on hand.

20180601_170317

You have to cook those mushrooms until all the water comes out of them and pools in the pan and the mushrooms are swimming in liquid.

20180601_170549

Unfortunately, this is when many people stop cooking the mushrooms!  Don’t stop!  Keep cooking them until all of that liquid is evaporated and the bottom of the pan is almost dry.  Now the mushrooms can develop some delicious browning, and acquire the rich, meaty flavor that they are destined to deliver to your dish!

20180601_171222

Now that the mushrooms have browned, it’s time to add a medium diced onion and a sprinkle more salt and pepper (or mushroom dust).  Push the mushrooms into a ring around the side of the pan and let that onion sweat in the middle for at least 5 minutes.  The mushrooms will continue to brown and add even more flavor to the bottom of your pan.

20180601_171550

Then add four tablespoons flour and stir it around for at least a minute, until every morsel of mushroom and onion is coated with that buttery flour mixture.  Pour in two to three cups of beef broth, stirring constantly, until you have a silky sauce.  A tablespoon of mushroom ketchup is another delightful addition at this point but make sure to adjust your salt accordingly.

20180601_172323

Now for the meat.  A sirloin steak is good for this.  The pictures that accompany this show a leftover steak that I had cooked to medium rare and sliced up to stir into the mushrooms and sauce.

20180601_170837

I usually let the beef simmer in the sauce just long enough to heat it through and let it share some flavor with the sauce.  An alternative is to cook a steak in the cast iron pan before cooking the mushrooms, which adds some lovely flavor to the fat that the mushrooms cook in!  Remember, mushrooms are little sponges and will absorb flavors and then release them into the sauce you serve them with.

Stroganoff wouldn’t be stroganoff without sour cream.  My lactose intolerance makes this an issue.  However, the lovely company, Lactaid, now makes sour cream!  This makes me happy because now I can make this delicious dish once again.

20180601_174319

After the meat has simmered for about 5 minutes, turn off the heat and add one half to one cup of sour cream to your sauce, depending on your taste.  Do this off heat or the sour cream will curdle.  You now have a lovely, creamy, mushroom-y Stroganoff to delight your taste buds.

20180601_175004

Now all you have left to do is boil up some egg noodles and plate your delicious dinner!

20180601_175221


Mushroom Ketchup is Amazing!

I don’t eat soy.  It’s a legume and my body does not react well to legumes, so I have decided to avoid soy as much as I can.  But soy sauce adds a little certain something to most dishes and I miss it when it’s not there.  It’s a way to add salt and “umami” flavor to soup and stew.  Mix it with ginger and garlic and honey and you have a dipping sauce that will change a bland piece of chicken to a delicious meal!  But, I really want to avoid soy sauce, so I went looking for a substitute.

I happened to be wandering down a YouTube “rabbit trail” of cooking shows and found a channel, called Townsends, that shares 18th Century recipes.  One of the recipes that they shared was for Mushroom Ketchup.  It apparently was frequently used back in the 18th century as a regular sauce or condiment for meat.  I was intrigued with the idea of using this as a substitute for soy sauce.  Mushrooms are full of glutamates, which are the flavoring agents that add that meatiness and richness that soy sauce contributes to food.  They are full of minerals (potassium, copper, selenium, phosphorus, and a bit of iron, zinc, manganese and magnesium according to the internet) and contain fiber and protein.  I like mushrooms, they add some of the same flavor enhancers that soy sauce does, and the recipe contains salt like the soy sauce, so I thought it might make a good substitution.

IMG_1189

I adapted the Townsends recipe quite a bit.  I didn’t cook it over an open fire in the woods, and I used modern tools and ingredients.  I also didn’t have the spices they used so added the ones in my cupboard, that I like.  I also cut the recipe in half since I wasn’t sure I’d like it and didn’t want to waste ingredients.  In the future, I have decided to keep making the recipe as written below because it makes an amount that I can use up in a reasonable amount of time.  I will definitely make it again because it is delicious and is a fantastic substitute for soy sauce.  

IMG_1192

Here is the recipe I used:

1 pound button or Cremini mushrooms

2 Tablespoons kosher salt 

1 bay leaf

1 medium onion

Zest of one lemon

1/2 Tablespoon grated horseradish

1/2 teaspoon ground black pepper

1/4 teaspoon ground cloves

1/4 cup apple cider vinegar 

Wipe the mushrooms clean with a damp paper towel and dice them into 1/4 inch pieces.  Place them into a glass bowl and sprinkle with the salt.  Add the bay leaf and stir thoroughly, continuing to break up the mushrooms.  Cover with plastic wrap and leave on the counter overnight or for about 12 hours.  Pour the mushroom mixture into a large saucepan and add the onions, lemon zest, spices and vinegar.  Bring to a boil, reduce the heat and simmer for 15 minutes.  Allow to cool and pour through a fine strainer lined with cheesecloth placed over a large bowl.  Squeeze all the liquid out of the solids into the bowl and pour into a bottle (I used a clean coffee creamer bottle). This is your mushroom ketchup!  Mine has kept in the refrigerator for three months so far with no change in quality. 

Save the solids!  Do not throw these away because they still contain a great deal of flavor.  Spread the solids out onto a parchment lined baking tray and place in a 175-200 degree oven for 3-4 hours until completely dried out.  (I mean completely–no moisture at all!)  Pour these dried bits of deliciousness into your nearest spice grinder and grind to a fine powder.  Sprinkle this on anything, especially steak, chicken, fish, pork or vegetables.  It will change your life.  

IMG_1190

I have used mushroom ketchup as a replacement for soy sauce in dipping sauces, marinades and braising liquids and it has worked beautifully.  It adds all the salty umami flavor I could want without the soy that my body does not like.


Which 10 Kitchen Utensils Do I Keep?

I am going to be severely downsizing my kitchen in the next few months.  As a part of the process, I have set myself the task of deciding which ten kitchen utensils I consider essential for my cooking style.  Why ten?  I don’t have an arbitrary reason.  The utensil collection may end up being 11 or 12 items at the end.  What I wanted to do was start the process of deciding what tools I cannot live or cook without.  I am not including knives, pots and pans, or appliances in this process because those are for other posts and other spaces in the new kitchen.  This is just about the things that sit in the jar on my counter or in my drawer that I will take with me into the small kitchen. 

1.      Tongs.  I must have my tongs.  I own two sets and will only take one with me.  So, I think I will take the longer ones.  They are useful for turning meat over, grabbing things out of boiling water, and getting things out of tall cupboards so they need to come along.

2.     Wooden scraper.  I use this thing almost every time I cook in my cast iron (which is almost every time I cook).  It’s great for getting those yummy brown bits off the bottom of the pan into whatever sauce I’m making.  It’s gentle on the surface of my one non-stick skillet.  I replace it every time it gets tired-looking so it is a necessary part of the permanent collection.

3.     Wooden spoon.  Not even optional.  Stirring.

IMG_1141

4.     Ladle.  I love making soup.  I usually keep my freezer full of chicken stock so that I can make rich, thick, warm soups all winter and fresh, vegetable-y soups all spring and summer.  You can’t have soup without a ladle to get that lovely broth into your bowl!

5.     Serving spoon.  Being able to scoop a sauce out of a pan and drizzle it gently over a steak or a pork chop is one of the joys of cooking!  You need a large spoon to do it with. 

6.     Silicone scraper.  I don’t like to waste food, so this is a necessity.  I carefully measure and plan my recipes, so I need every morsel to make it into the final product.  When dealing with sticky dough or batter (or marshmallow goo) it’s important to have a heavy-duty scraper to move that stuff around!

img_1142.jpg

7.     Slotted spoon.  I make a lot of stock and this is helpful for getting the big chunks of bone and vegetables out of the stock before straining.  It’s also good for getting bacon bits and sautéed mushrooms out of a pan so you can use the flavorful fat to sauté other lovely vegetables.

8.     Can opener.  I don’t eat a lot of stuff that comes out of a can.  Except cranberry sauce.  I do like a good turkey sandwich on whole wheat bread with cranberry sauce.  I make homemade for the holidays but do buy the little cans for the rest of the year.  I also sometimes feed Snickers some canned pumpkin if he gets an upset tummy, so I guess the can opener will move into the little kitchen.

9.     Whisk.  I originally had something else on this list but when I went to take everything else out of the utensil jar I realized that I forgot the whisk!  I had to take the zester off the list (it’ll go on another list because I can’t live without my zester)!  It’s impossible to make a smooth sauce or roux without having a good, sturdy whisk.  Scrambled eggs with a fork always end up with bits of white floating around and there’s no way to get egg whites fluffy with a fork.

10.  Pastry brush.  Adding a little spicy or sweet glaze to a piece of chicken as it roasts on the grill or in the oven is a good way to finish an otherwise boring piece of meat.  While it can be done with a spoon, the more even coverage from a silicone brush makes for a more beautiful presentation.

  img_1143.jpg

This is the list of ten items that I am going to keep in my tiny kitchen.  I will give more information about the tiny plan coming to fruition in the next few months, but this is the first step in the process.  I am going to take everything except these ten items out of the kitchen for the next month and see how it goes with only these ten things.  If it works, I’ll keep this list.  If I need to add a few, I’ll keep you posted!

Lactose-Free Cheese

I made lactose-free cheese!  I actually make this fairly frequently because my lactose intolerance is a new thing for me and I like having cheese on things like baked potatoes and burgers.  This cheese does not melt like cheddar or American.  It acts more like ricotta or feta.  But it’s lactose-free so I can eat it!

I looked at many of the lactose-free or vegan cheeses on the market and most of them are made from soy or nuts, which are on the list of things I cannot eat.  Very disappointing.

When I originally decided to try this, I wasn’t sure what role lactose plays in the making of cheese so I wasn’t even sure this would work.  I decided to experiment with a small carton of Lactaid milk and it turned out really nice.  So now I make a batch every two weeks or so.

Making farmer’s cheese is really easy.  I use 2% Lactaid to keep the fat content down.  I add flavorings depending on what I’m planning on using it for.  This week, I added garlic, chives, and black pepper to 2 quarts of milk in a large saucepan and heat it up to 195 degrees F.  This lets the flavors infuse into the milk as it heats up.  IMG_1090
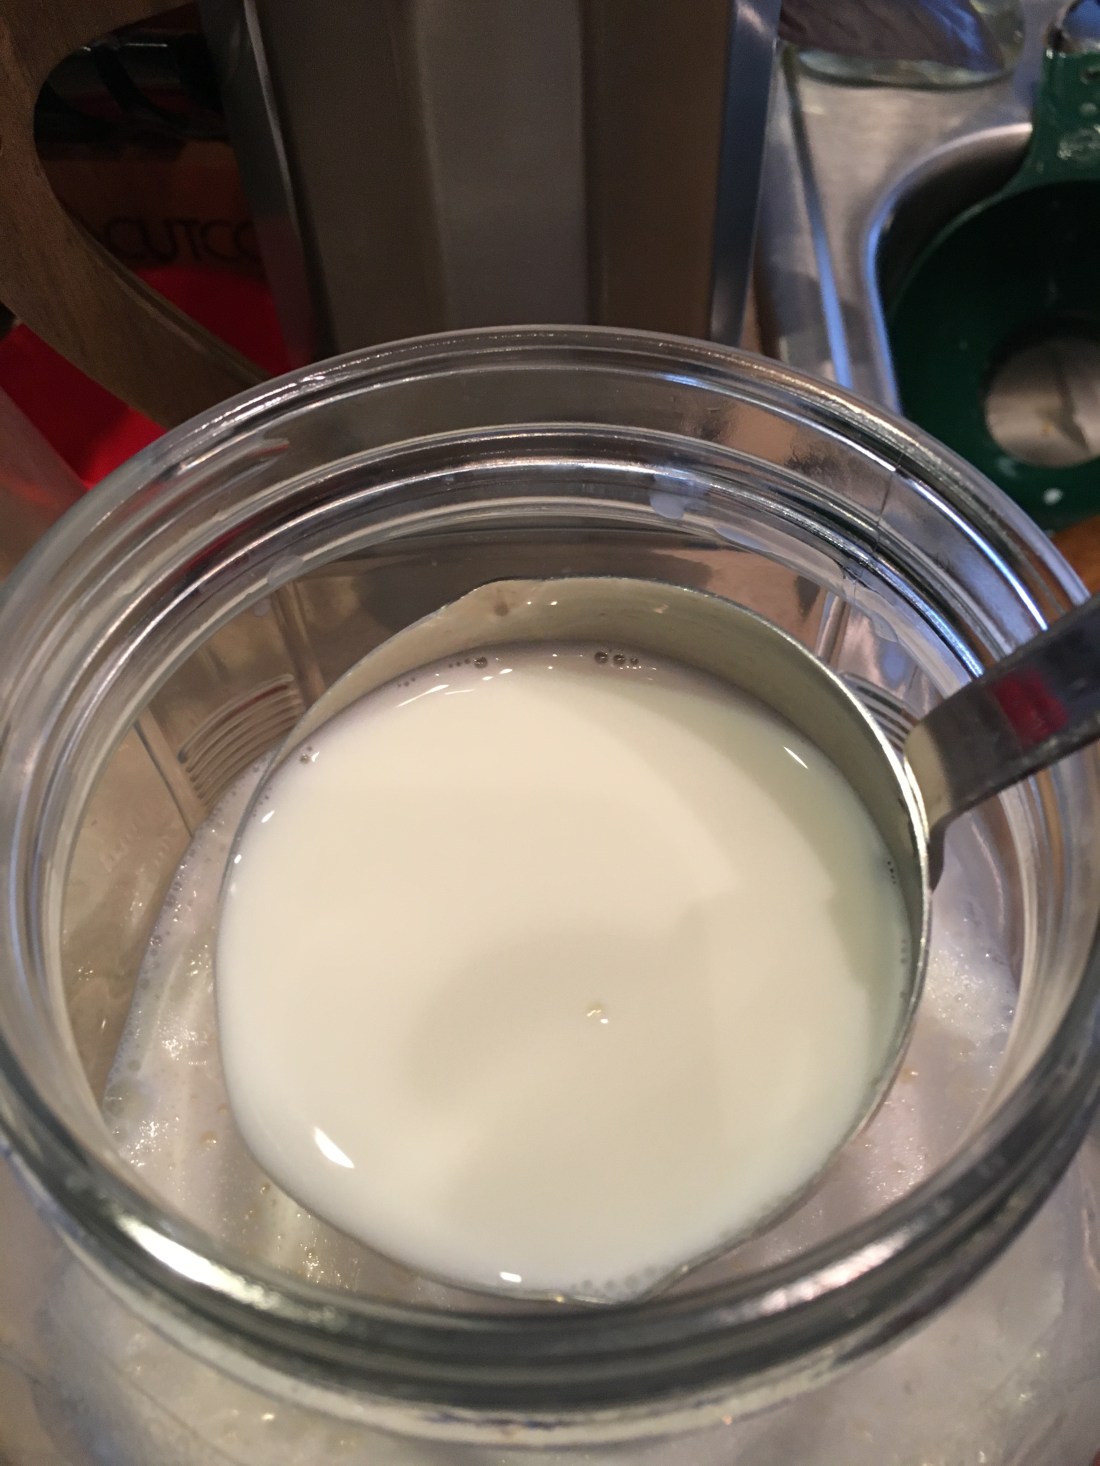
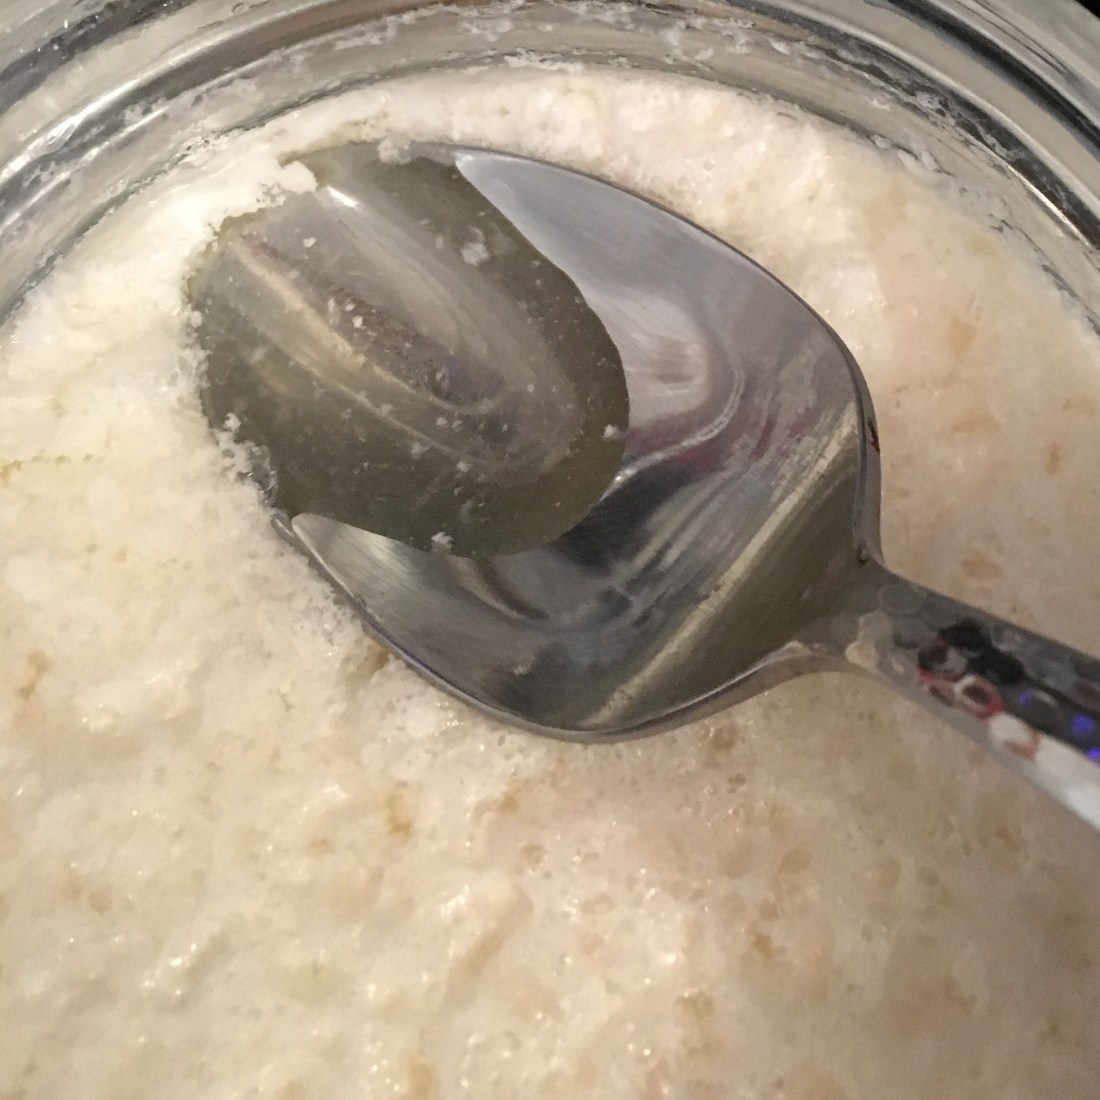
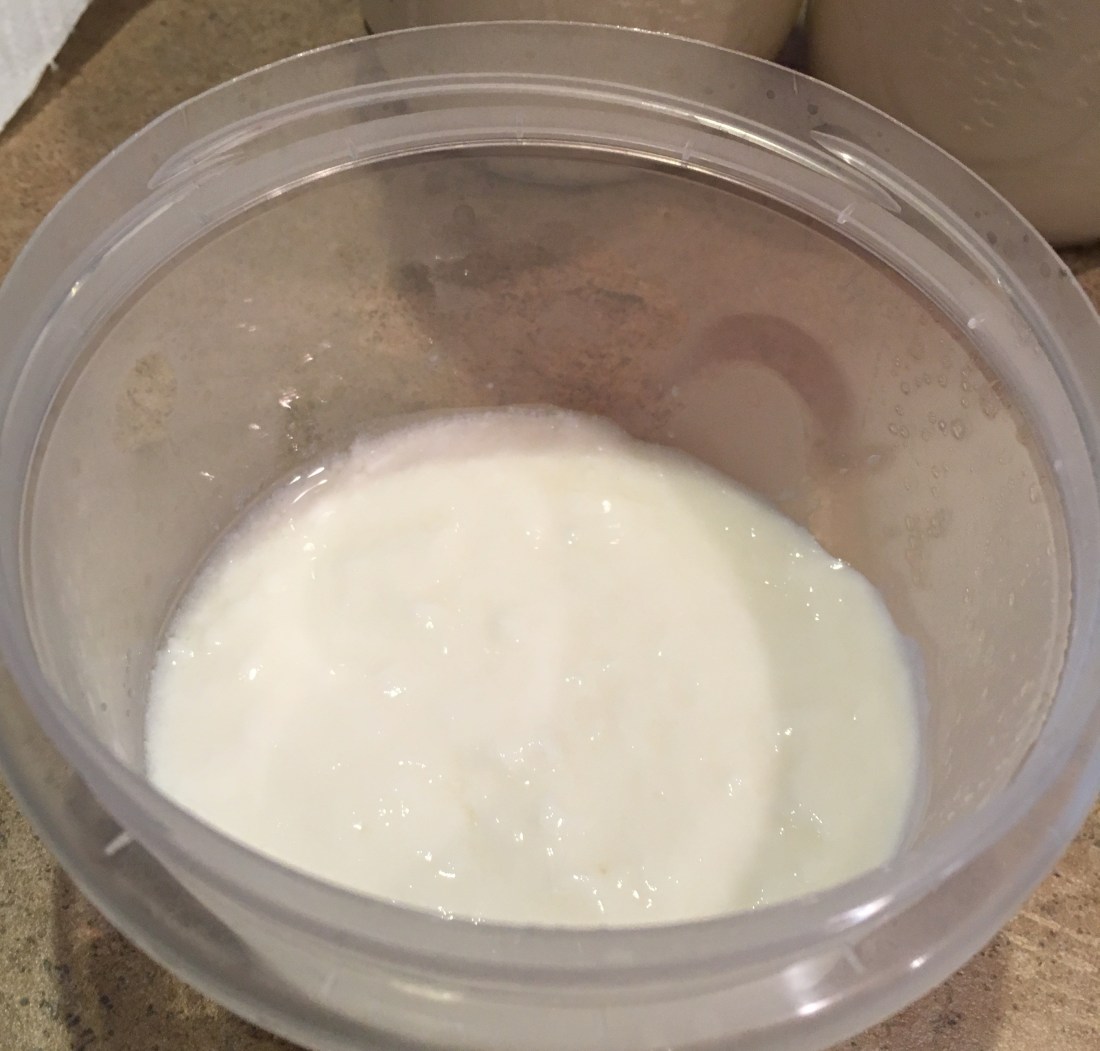
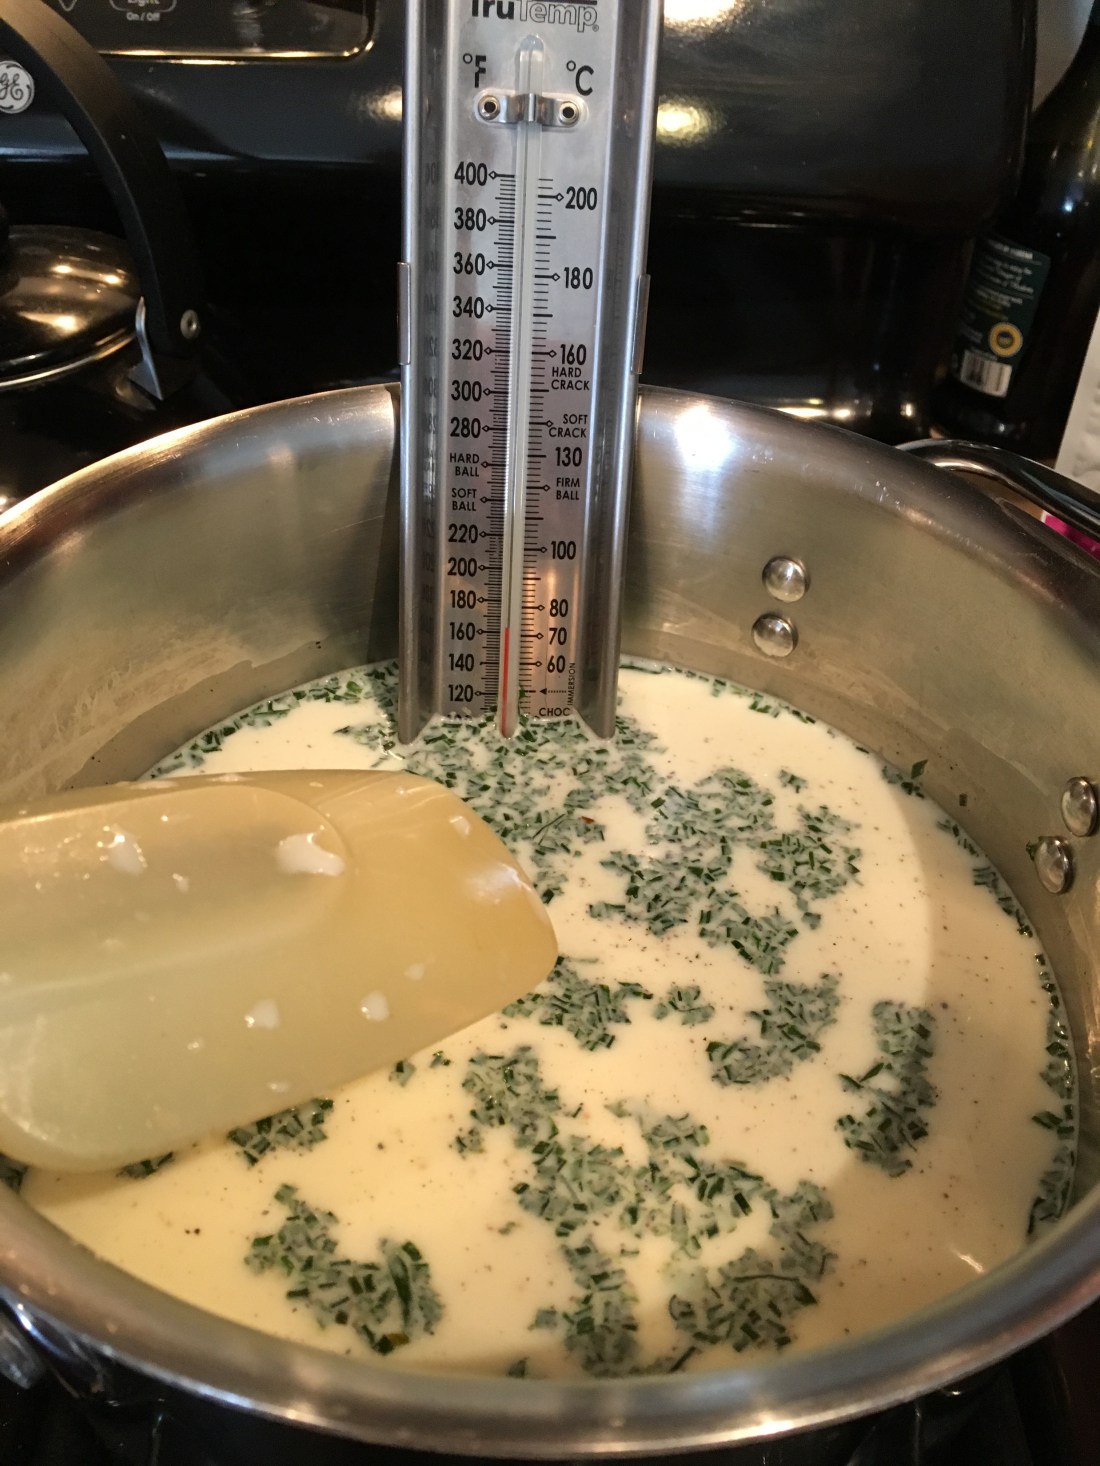
Once it reaches temperature, I turn off the heat and add the juice of one lemon and stir one time.  Then, I just walk away for 15 minutes!  I don’t stir it or poke it or do anything else to it.  It will separate into curds and whey and look really disgusting.  That’s okay. IMG_1094 While I am letting it do its thing, I take a fine mesh strainer and line it with two layers of cheesecloth.  I then place the strainer over the sink and pour the curds and whey mixture into the strainer.  IMG_1095
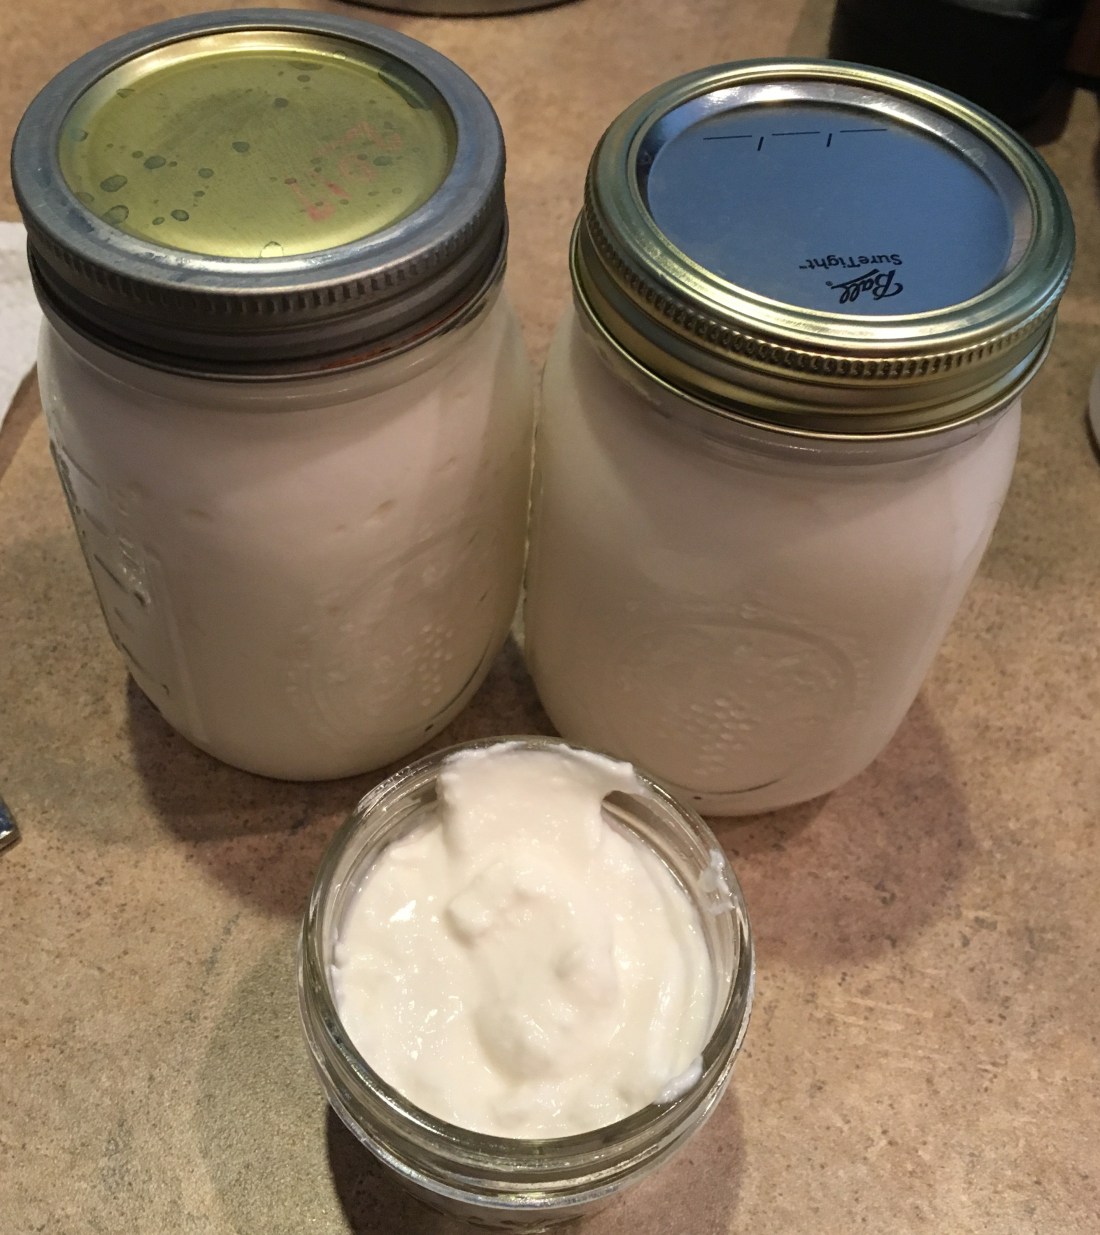
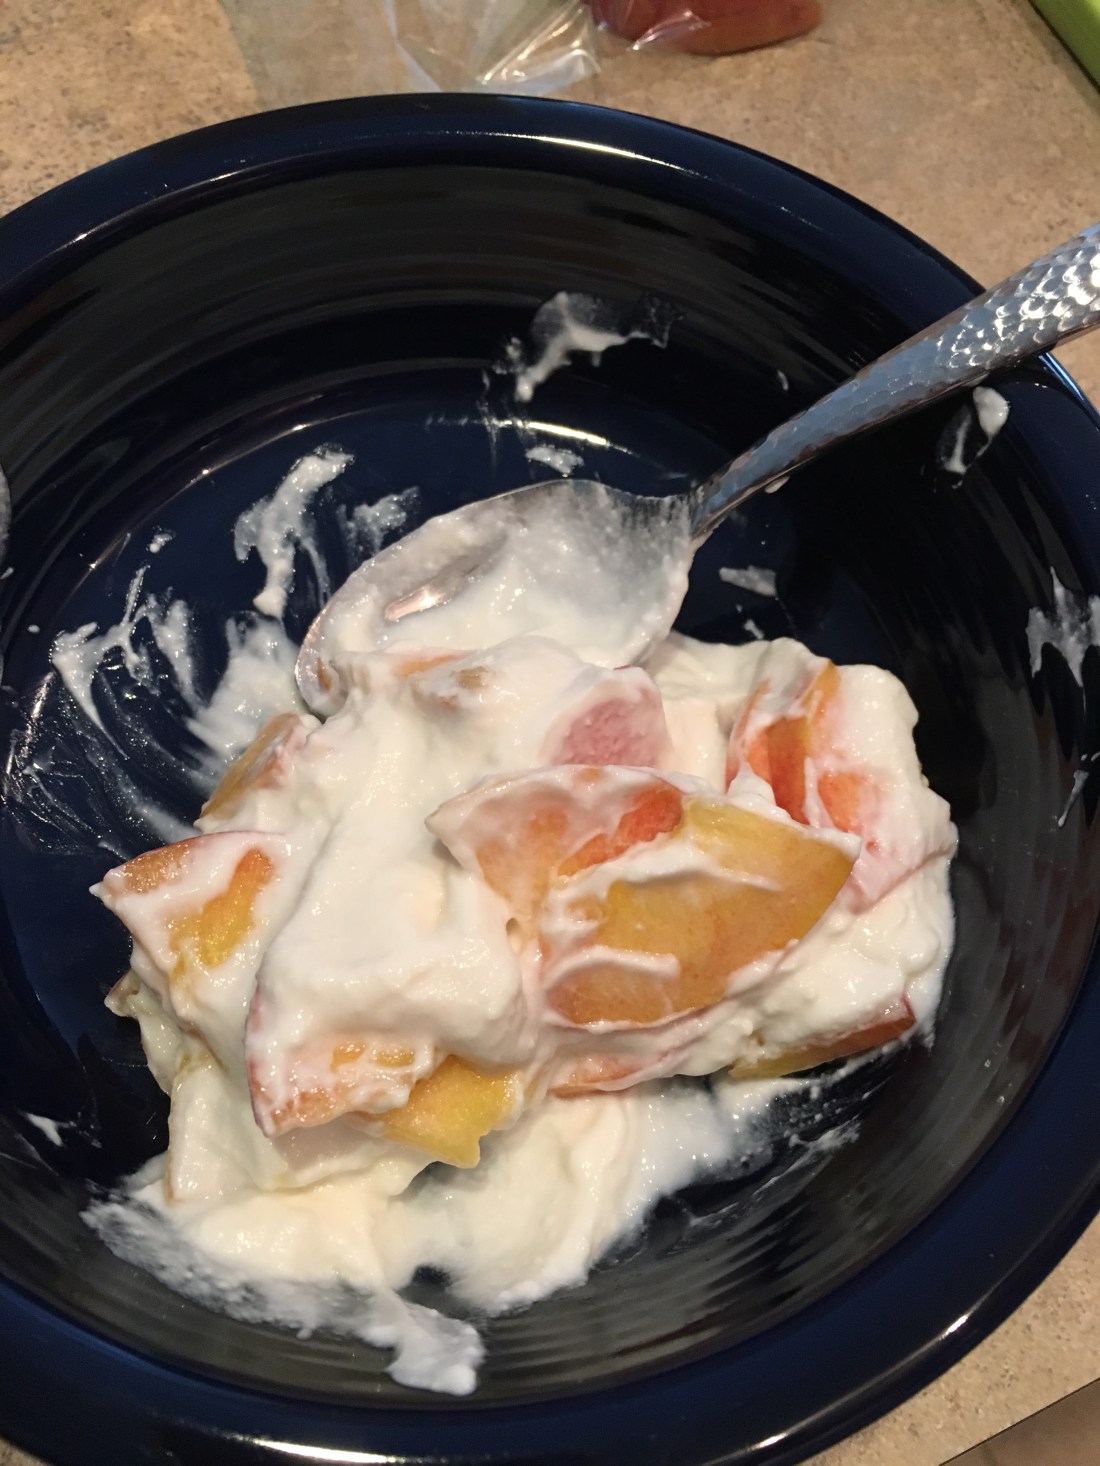
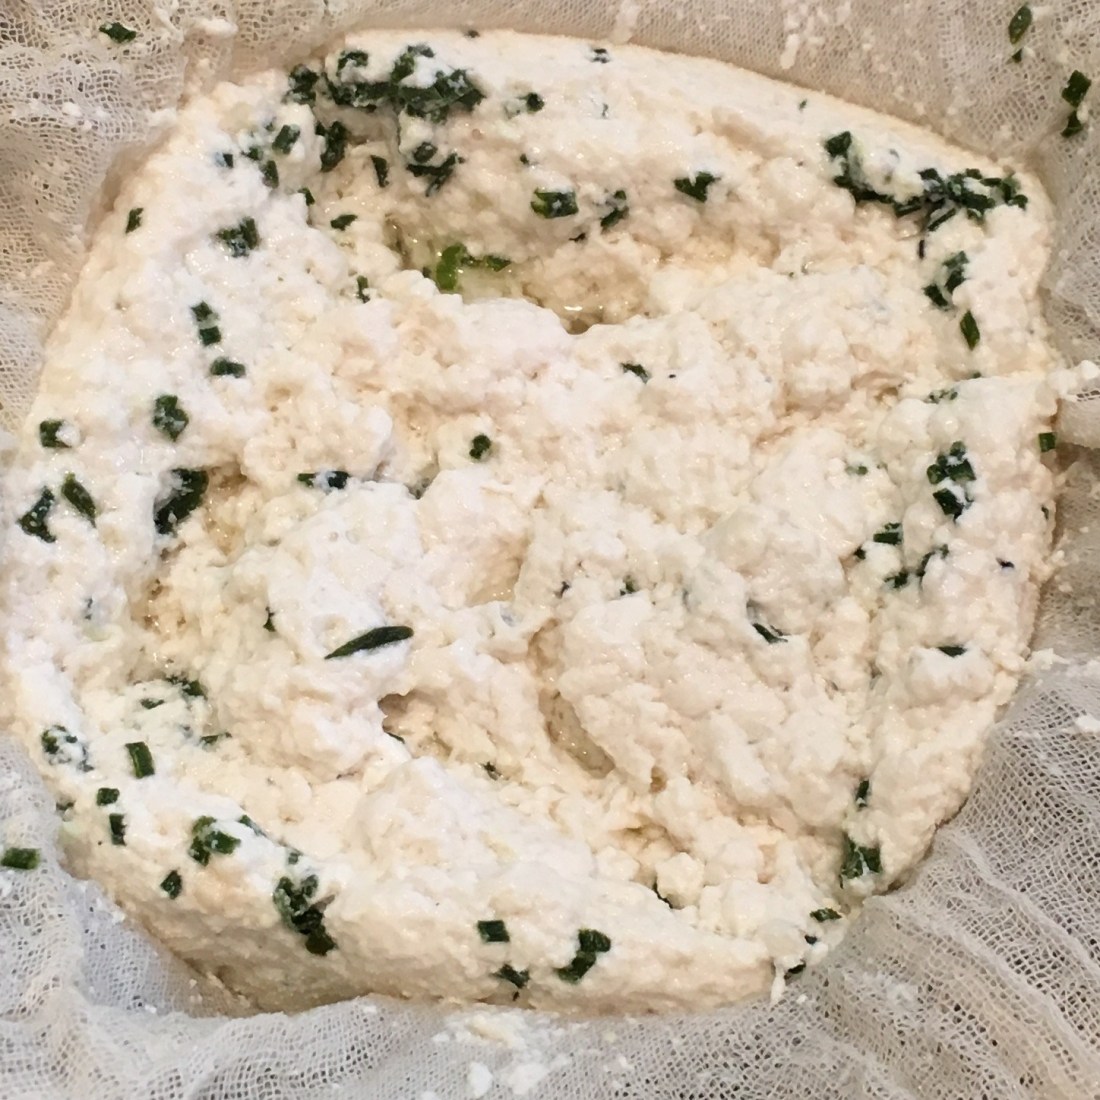
Depending on what I am going to use it for will determine how long I let it strain.  If I’m going to put it on baked potatoes I will leave it rather soft and creamy like ricotta.  If I want it to spread on crackers, I let more of the whey strain out and let it get spreadable.  If I want crumbles for salad, I squeeze all the whey out and crumble the curds!   After I’m done draining the whey out and have the consistency the way I like it, I add salt to taste.  Otherwise, it’s very bland.  Just add a tiny bit at a time until it tastes like you want it to.  It’s a delicious, lactose-free way to have cheese-y deliciousness in my dairy-free life.

Amaretto Marshmallows!

I make marshmallows. 

I make them in a variety of dessert flavors and for many different occasions.  I put them on sticks because people love treats on sticks!  

The other day, I was asked if I could make Amaretto flavored marshmallows.  I’m allergic to nuts so I usually don’t make any of my marshmallows with any kind of nut flavoring or garnish.  But I’ve been wanting to try some “adult beverage” flavored marshmallows for a while so I decided to experiment.  I replaced some of the water with Amaretto and the marshmallows “gelled” like they are supposed to.  However, because I am allergic to almonds, I was afraid to taste them!  Thanks to the internet, though, I found out that most Amaretto is made from apricot pits, not almonds.  Also, according to one of the articles I read, the amount of nut extract that makes it into any nut-based liquor is negligible and shouldn’t cause a reaction.  So, I decided that it was safe for me to taste them with my Epi-pen at the ready. No reaction to the tiny nibble I tasted!  They taste just like the beverage smells, so I think I got the flavor right.  For garnish, though, I wanted to emphasize the almond flavor as well as the apricot flavor of the beverage.  I crushed up some almond crisp cookies and some freeze-dried apricots and mixed them together to sprinkle on the marshmallows.  I wore gloves and a face mask and didn’t get itchy! The marshmallows are beautiful and, according to my team of taste testers, they are delicious!  img_1084.jpg

Why Red Apron?

I love aprons.

When I was a little girl, we would go to my grandparents’ house every Sunday  for dinner and Grandma always wore an apron.  Grandpa would often help Grandma in the kitchen and he would wear an apron too.  They were good cooks.  Delicious roasts, lovely fresh vegetables, and tasty baked goods always featured at those dinners.

My mother, on the other hand, was a horrible cook.  Bland, over-salted, and boring meals permeated my childhood.  Our family cookbook was called “Shades of Gray” before it was sexy!  Part of the reason I love to cook now is because of the horrid meals I was forced to endure growing up.  Mom never wore an apron.

For me, aprons mean that good food is going to happen.  If I put on an apron, I am going to intentionally go into my kitchen and prepare food that I will enjoy or that will make someone happy.  Aprons mean intentionality.  I consciously put on an apron and choose how I am going to prepare food.  It means that I have decided to cook.  I’m not just going into the kitchen and shoving something in my face because it is a mealtime.  I’m going to prepare a good meal for myself because, even though I live alone and could easily reheat a frozen meal, I deserve to eat good food.

So, I love aprons.  I have five of them.  They remind me of my grandparents.  They tell me that I deserve to eat good, healthy food that I can prepare for myself.  Two of my aprons are red.  One of those has yeast sock puppets on it.  (If you know why, leave a comment!) My red aprons are my reminders that good food is my right and my responsibility.

Chocolate Avocado Muffins!

I got a wonderful recipe from a friend, who makes Banana Oatmeal muffins frequently.   They sound wonderful but I cannot eat bananas.  Also, the recipe includes Greek yogurt and I am lactose intolerant and cannot eat any dairy.  But the muffins sound good and, while I am not gluten-free (I already can’t eat everything else, please leave me my gluten!), I do like to eat oats because they are good for my cholesterol.  So, I set out to adapt this recipe for my own allergies.  The original recipe that I got from my friend is:

2 cups rolled oats, 2 ripe bananas, 1 cup Greek yogurt, 2 eggs, 2 Tbsp honey, 1 tsp vanilla, 1 1/2 tsp baking powder, 1/4 tsp baking soda, 1/2 cup chocolate chips.  Heat oven to 400 degrees. Place all ingredients except chocolate chips, in a blender or food processor and blend until smooth.  Fold in chocolate chips.  Scoop into a muffin tin.  Bake for 12-15 minutes.  Cool.

Since I have replaced bananas with avocado in a smoothie before, and I have baked a chocolate cake with avocado before, I decided to replace the two bananas with one large avocado.  Since the avocado has fat in it, I don’t need to add the fat from the yogurt but do need to replace the liquid.  I decided to use applesauce.  Since the batter turned out a really disgusting green color, I decided to add 1/4 cup cocoa to make the muffins chocolatey and cover up the green color.  This adds some bitterness so I added an extra Tbsp. of honey.  You could add more if you want sweeter muffins.  Also, the texture was not great, so next time I will grind the oats into flour before adding the rest of the ingredients.  This is my final recipe:

2 cups rolled oats, 1/4 cup cocoa, 1 large avocado, 1/2 cup unsweetened applesauce, 2 eggs, 3 T honey, 1 tsp vanilla, 1 1/2 tsp baking powder, 1/4 tsp baking soda, 1/2 cup chocolate chips.  Place all ingredients except chocolate chips in a food processor or blender and blend until smooth.  Grease muffin tin.  Bake at 400 degrees for 12-15 minutes until a toothpick inserted in the middle comes out clean.  Cool for 10 minutes, remove from pan and enjoy.